DIY: A Groovy Bathroom Cabinet Update

When we moved into our current house, we knew there were quite a few projects in our future. In fact, we bought this particular house because it had so much potential and we would be able to make it our own. What we did not know at the time was that in a few short weeks, I'd actually be pregnant with our second child. Suddenly, all the projects that I had been so excited about seemed impossible. I did what I could in between trips to the bathroom to vomit, but wasn't able to do much other than paint. Now my baby is a year old (sniff!) and I'm finally in a place where I have some time in the evenings after the kids are in bed to work on a project or two.
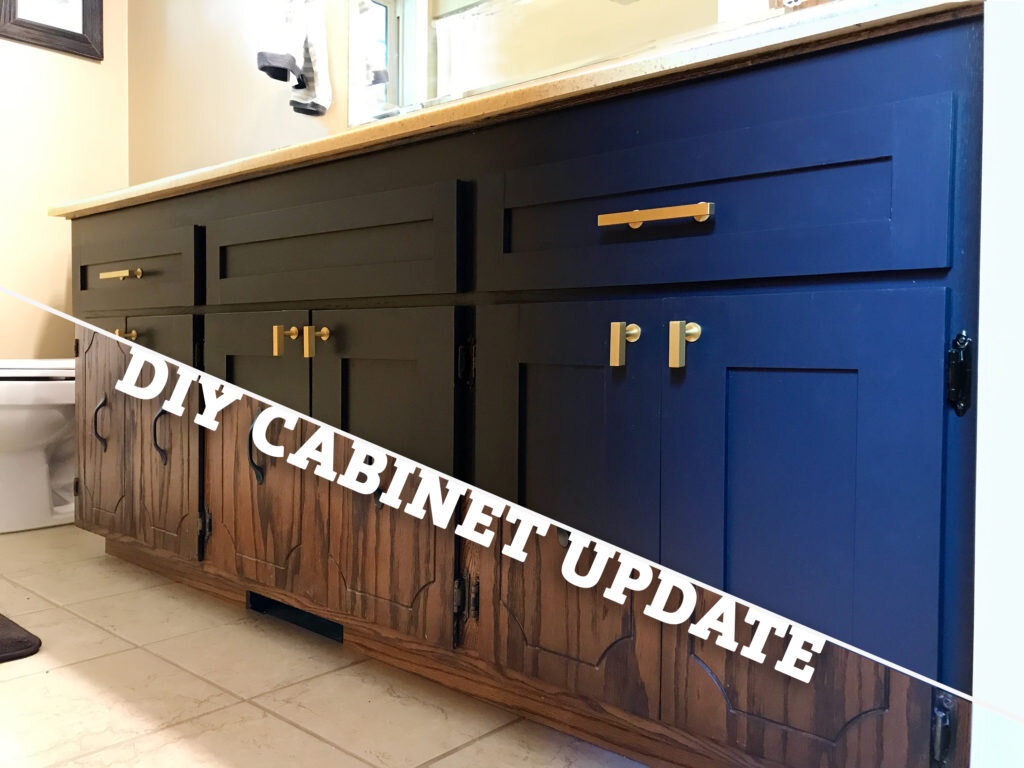
All of the cabinets in our home were original in 1976 and it's quite evident. When you walk into the kitchen or a bathroom, you are greeted by dark wood cabinets with a groovy routed design and pulls in the dead center of the cabinet door. Who does that?! We plan to do a complete kitchen overhaul at some point and at least one of our bathrooms will receive a full gut job, but in the meantime, we had to do something to update the look - starting with the guest bathroom vanity!

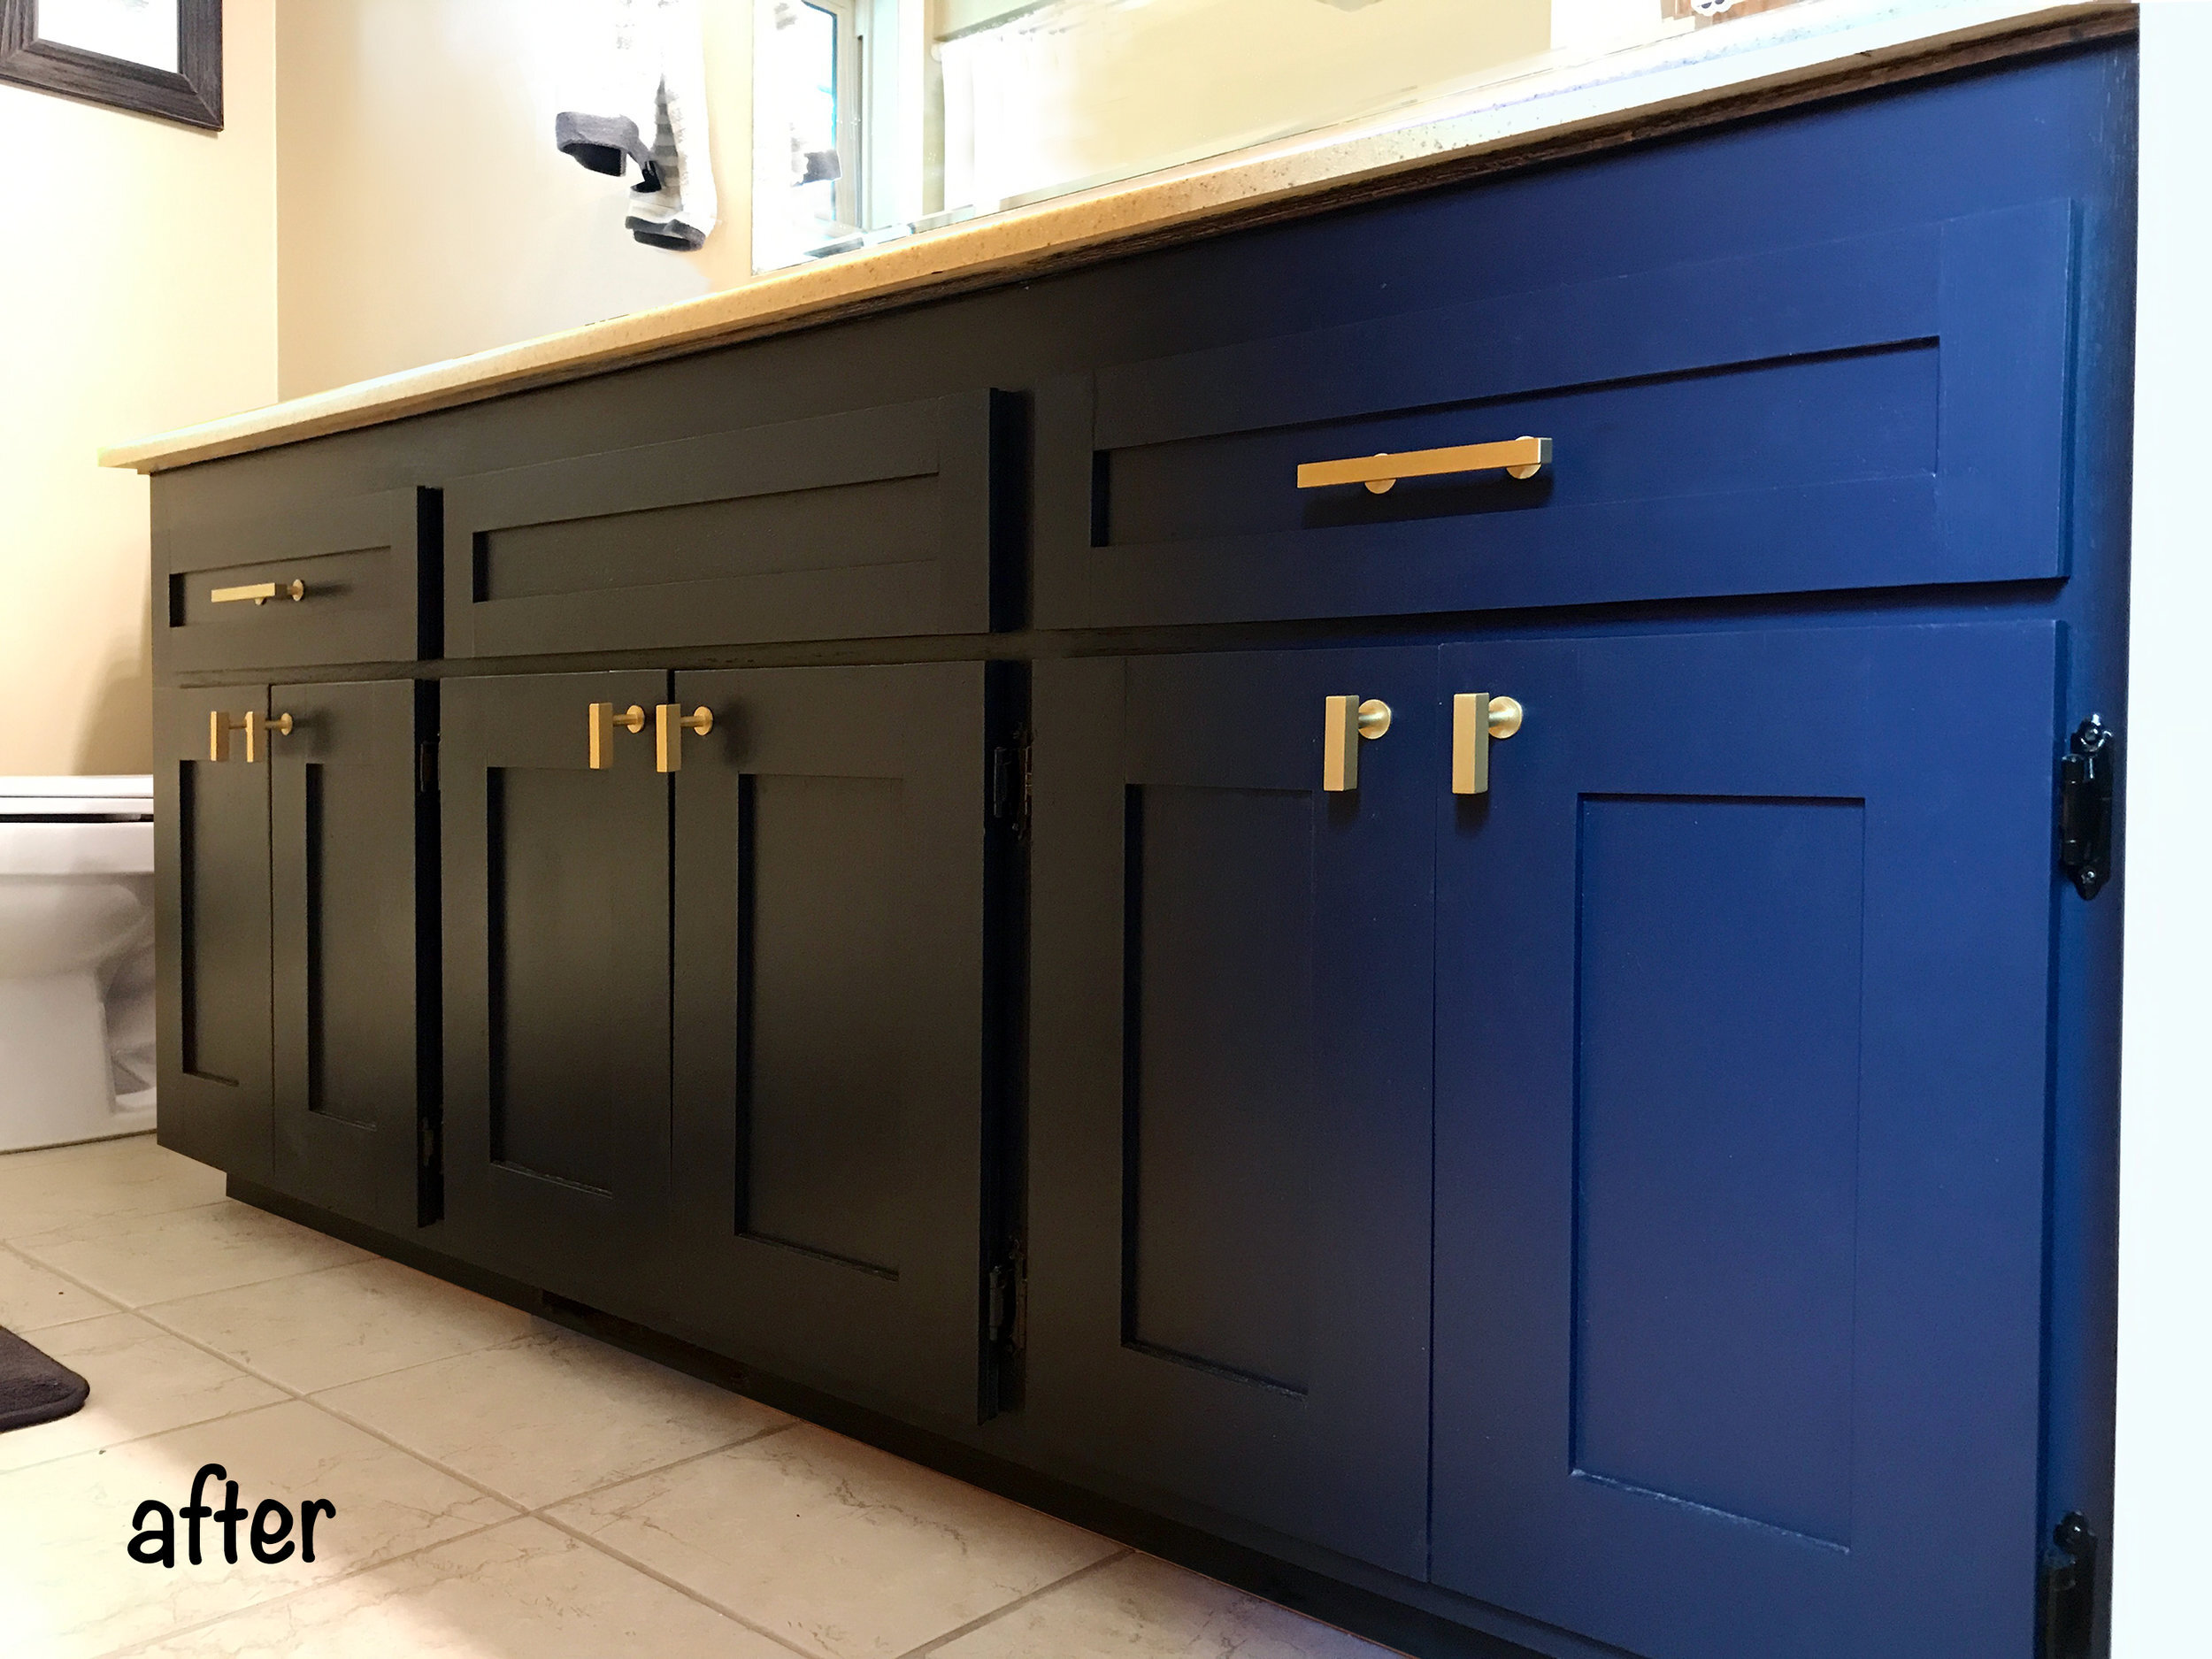
Below is the vanity after I covered the grooves in the door fronts, painted everything a rich navy blue and installed new hardware. I have other updates planned for the room (this mirror and this rug, for starters) but this is already such a huge improvement! I used to keep the bathroom door closed because I didn't want to look at this cabinet every time I came up the stairs, but now that door is wide open because I get to see this! It's an easy update, really inexpensive and only required a couple days of work. Below is the full tutorial so you can do this on your own cabinets for an updated look almost instantly. Who doesn't love an update that looks way more expensive than it is?
I had most of the tools and supplies on hand already but I did have to do a quick Home Depot run for the MDF sheets, a table saw and paint. If you don't have to cover up a groovy design on your cabinet doors like I did, you can choose to purchase pine lattice trim which comes in various widths. If you go that route, your materials may cost a bit more but you can avoid purchasing and using a table saw.

Tools:
- table saw (you can skip this if you use lattice trim instead)
- miter saw or miter box
- brad nail gun (this nailer is awesome!) OR manual nailer and nail set
- measuring tape
- screwdriver
- putty knife
- safety goggles
Supplies:
- 1/4" MDF sheets (I purchased two of the 2'x4' sheets for my project with about 2'x2' leftover)
- optional: lattice trim (comes in 12' length that you can cut in the store for easy transport)
- Plastic Wood or other wood filler
- 5/8" brad nails (depending on the thickness of your doors)
- mini foam roller & frame
- paint of your choice (I used Behr Ultra Satin in Starless Night)
- paint brush (my all-time favorite brush)
- 320 & 100 grit sandpaper
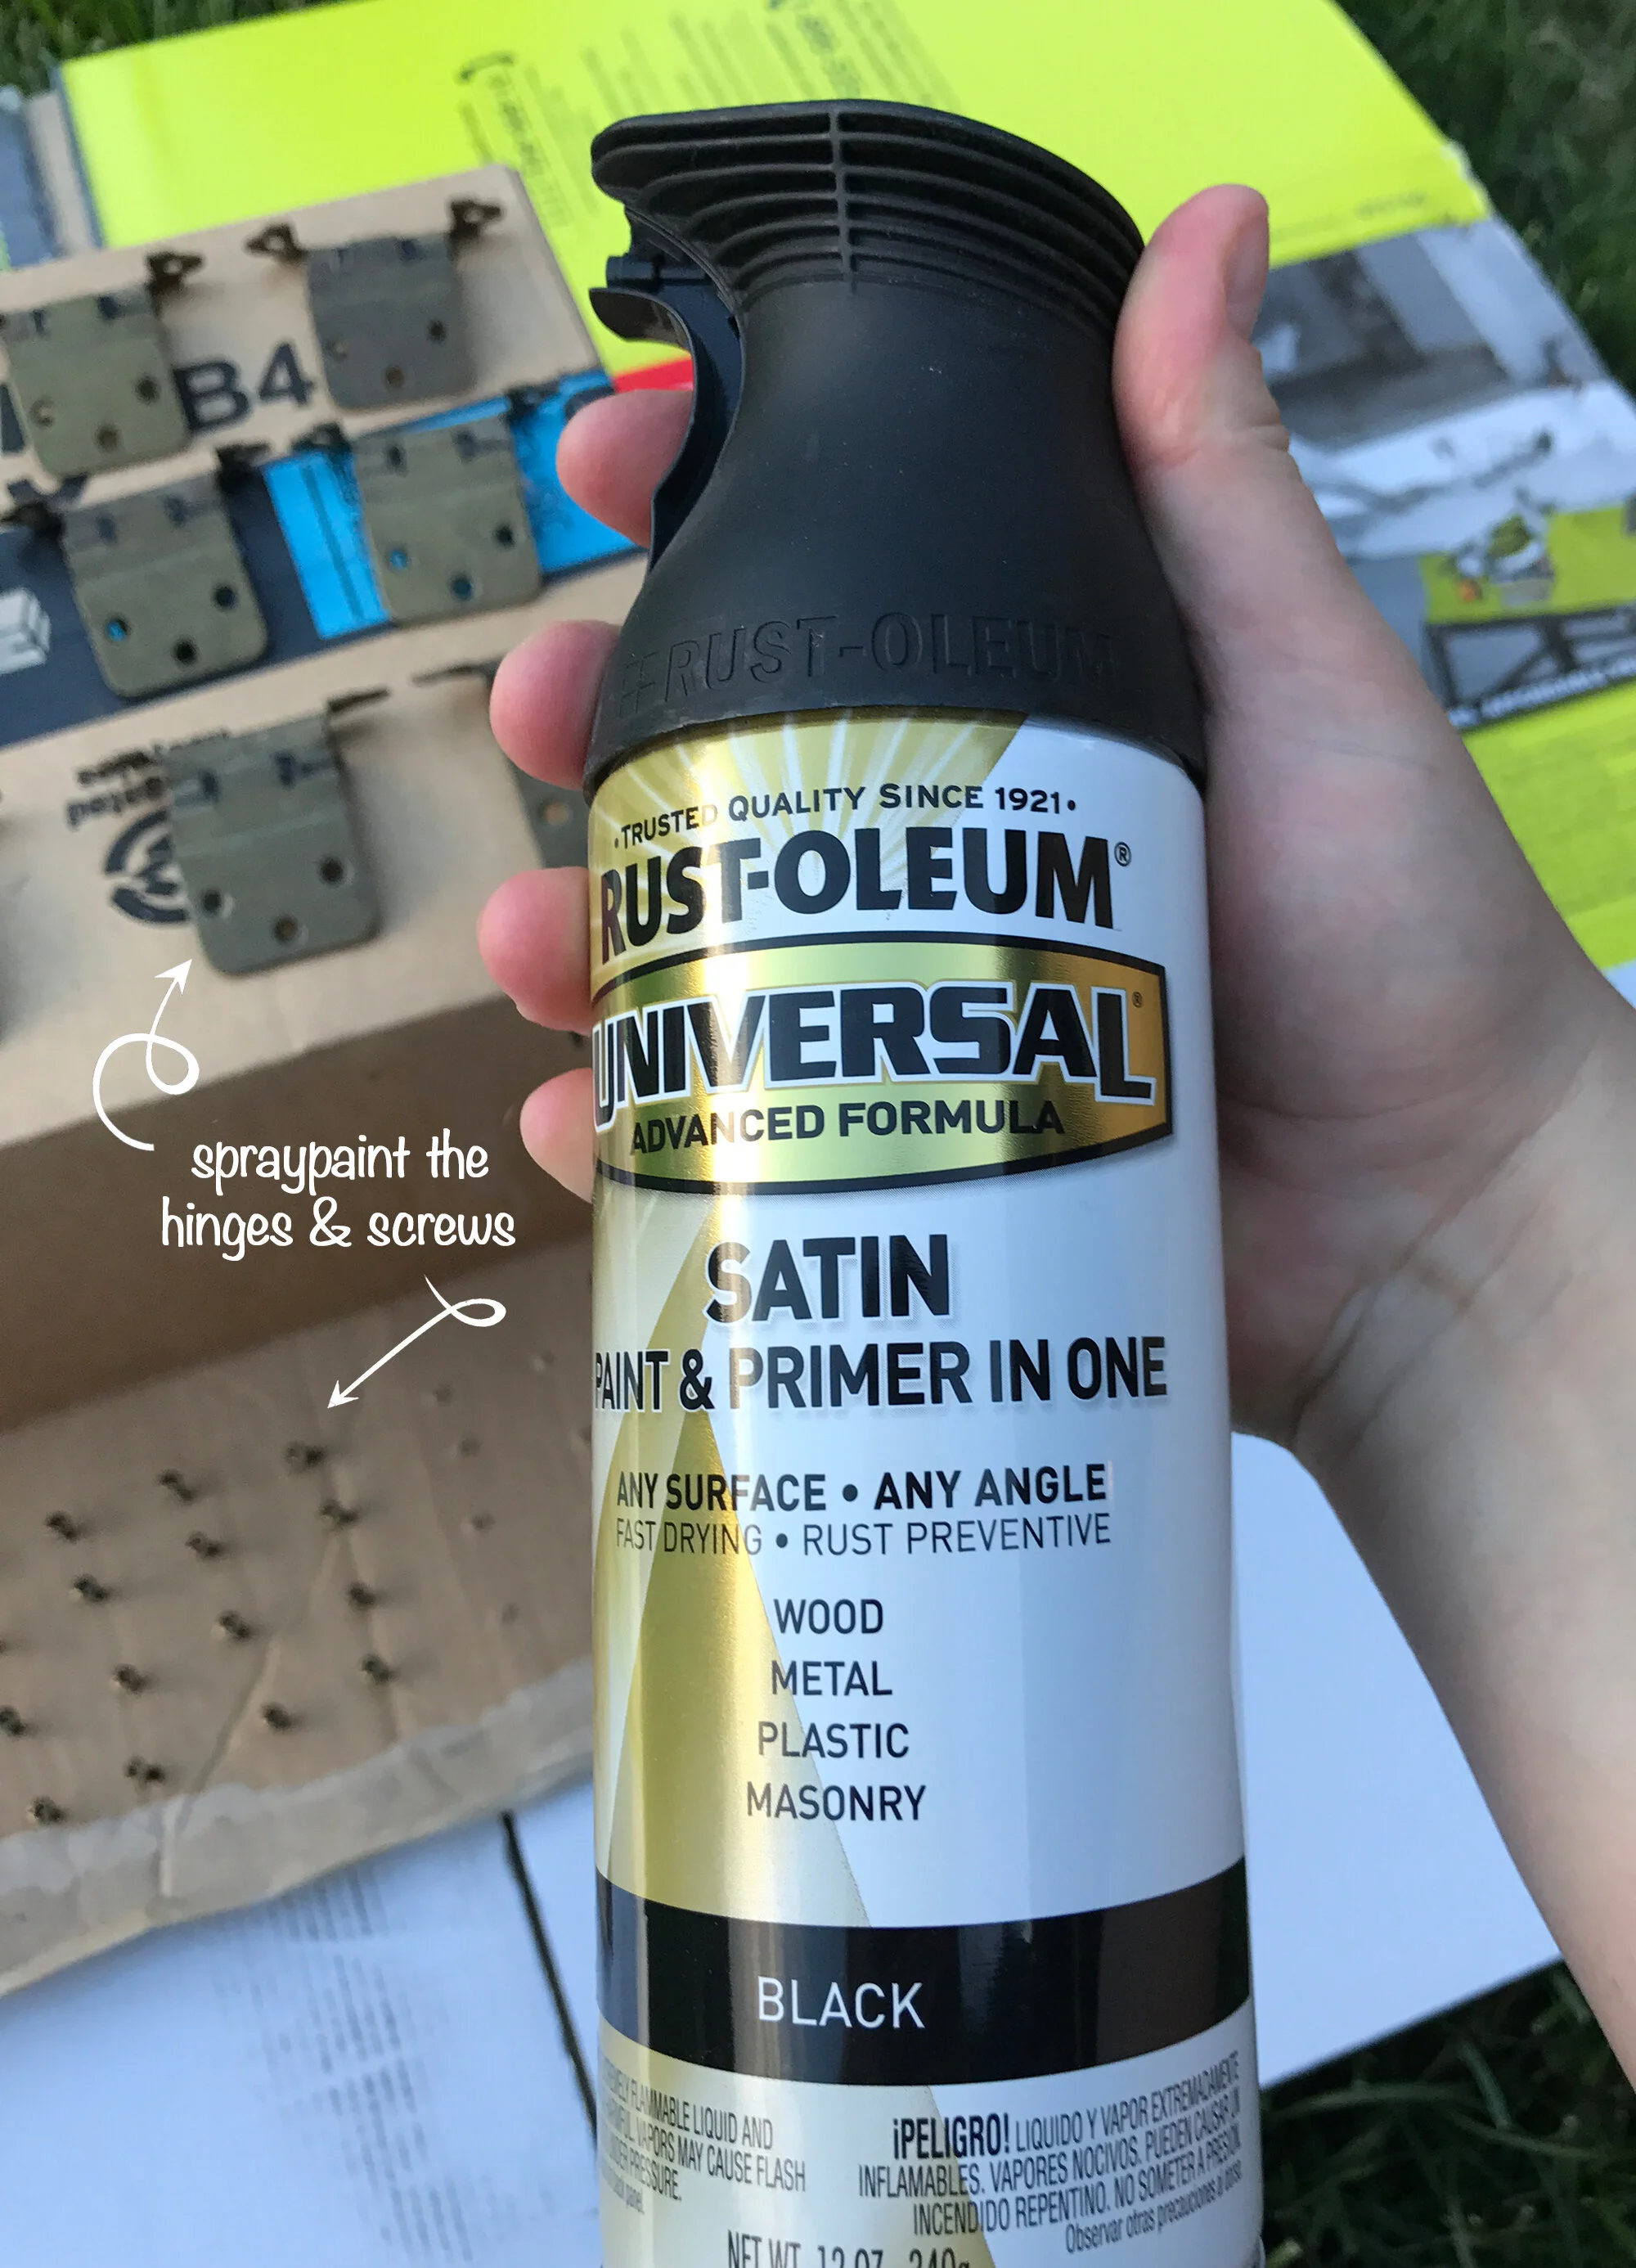
- optional: spray paint for existing hinges (I used Rustoleum satin black)
- optional: peanut butter M&Ms (because you'll need a snack with protein)
- optional: new cabinet hardware
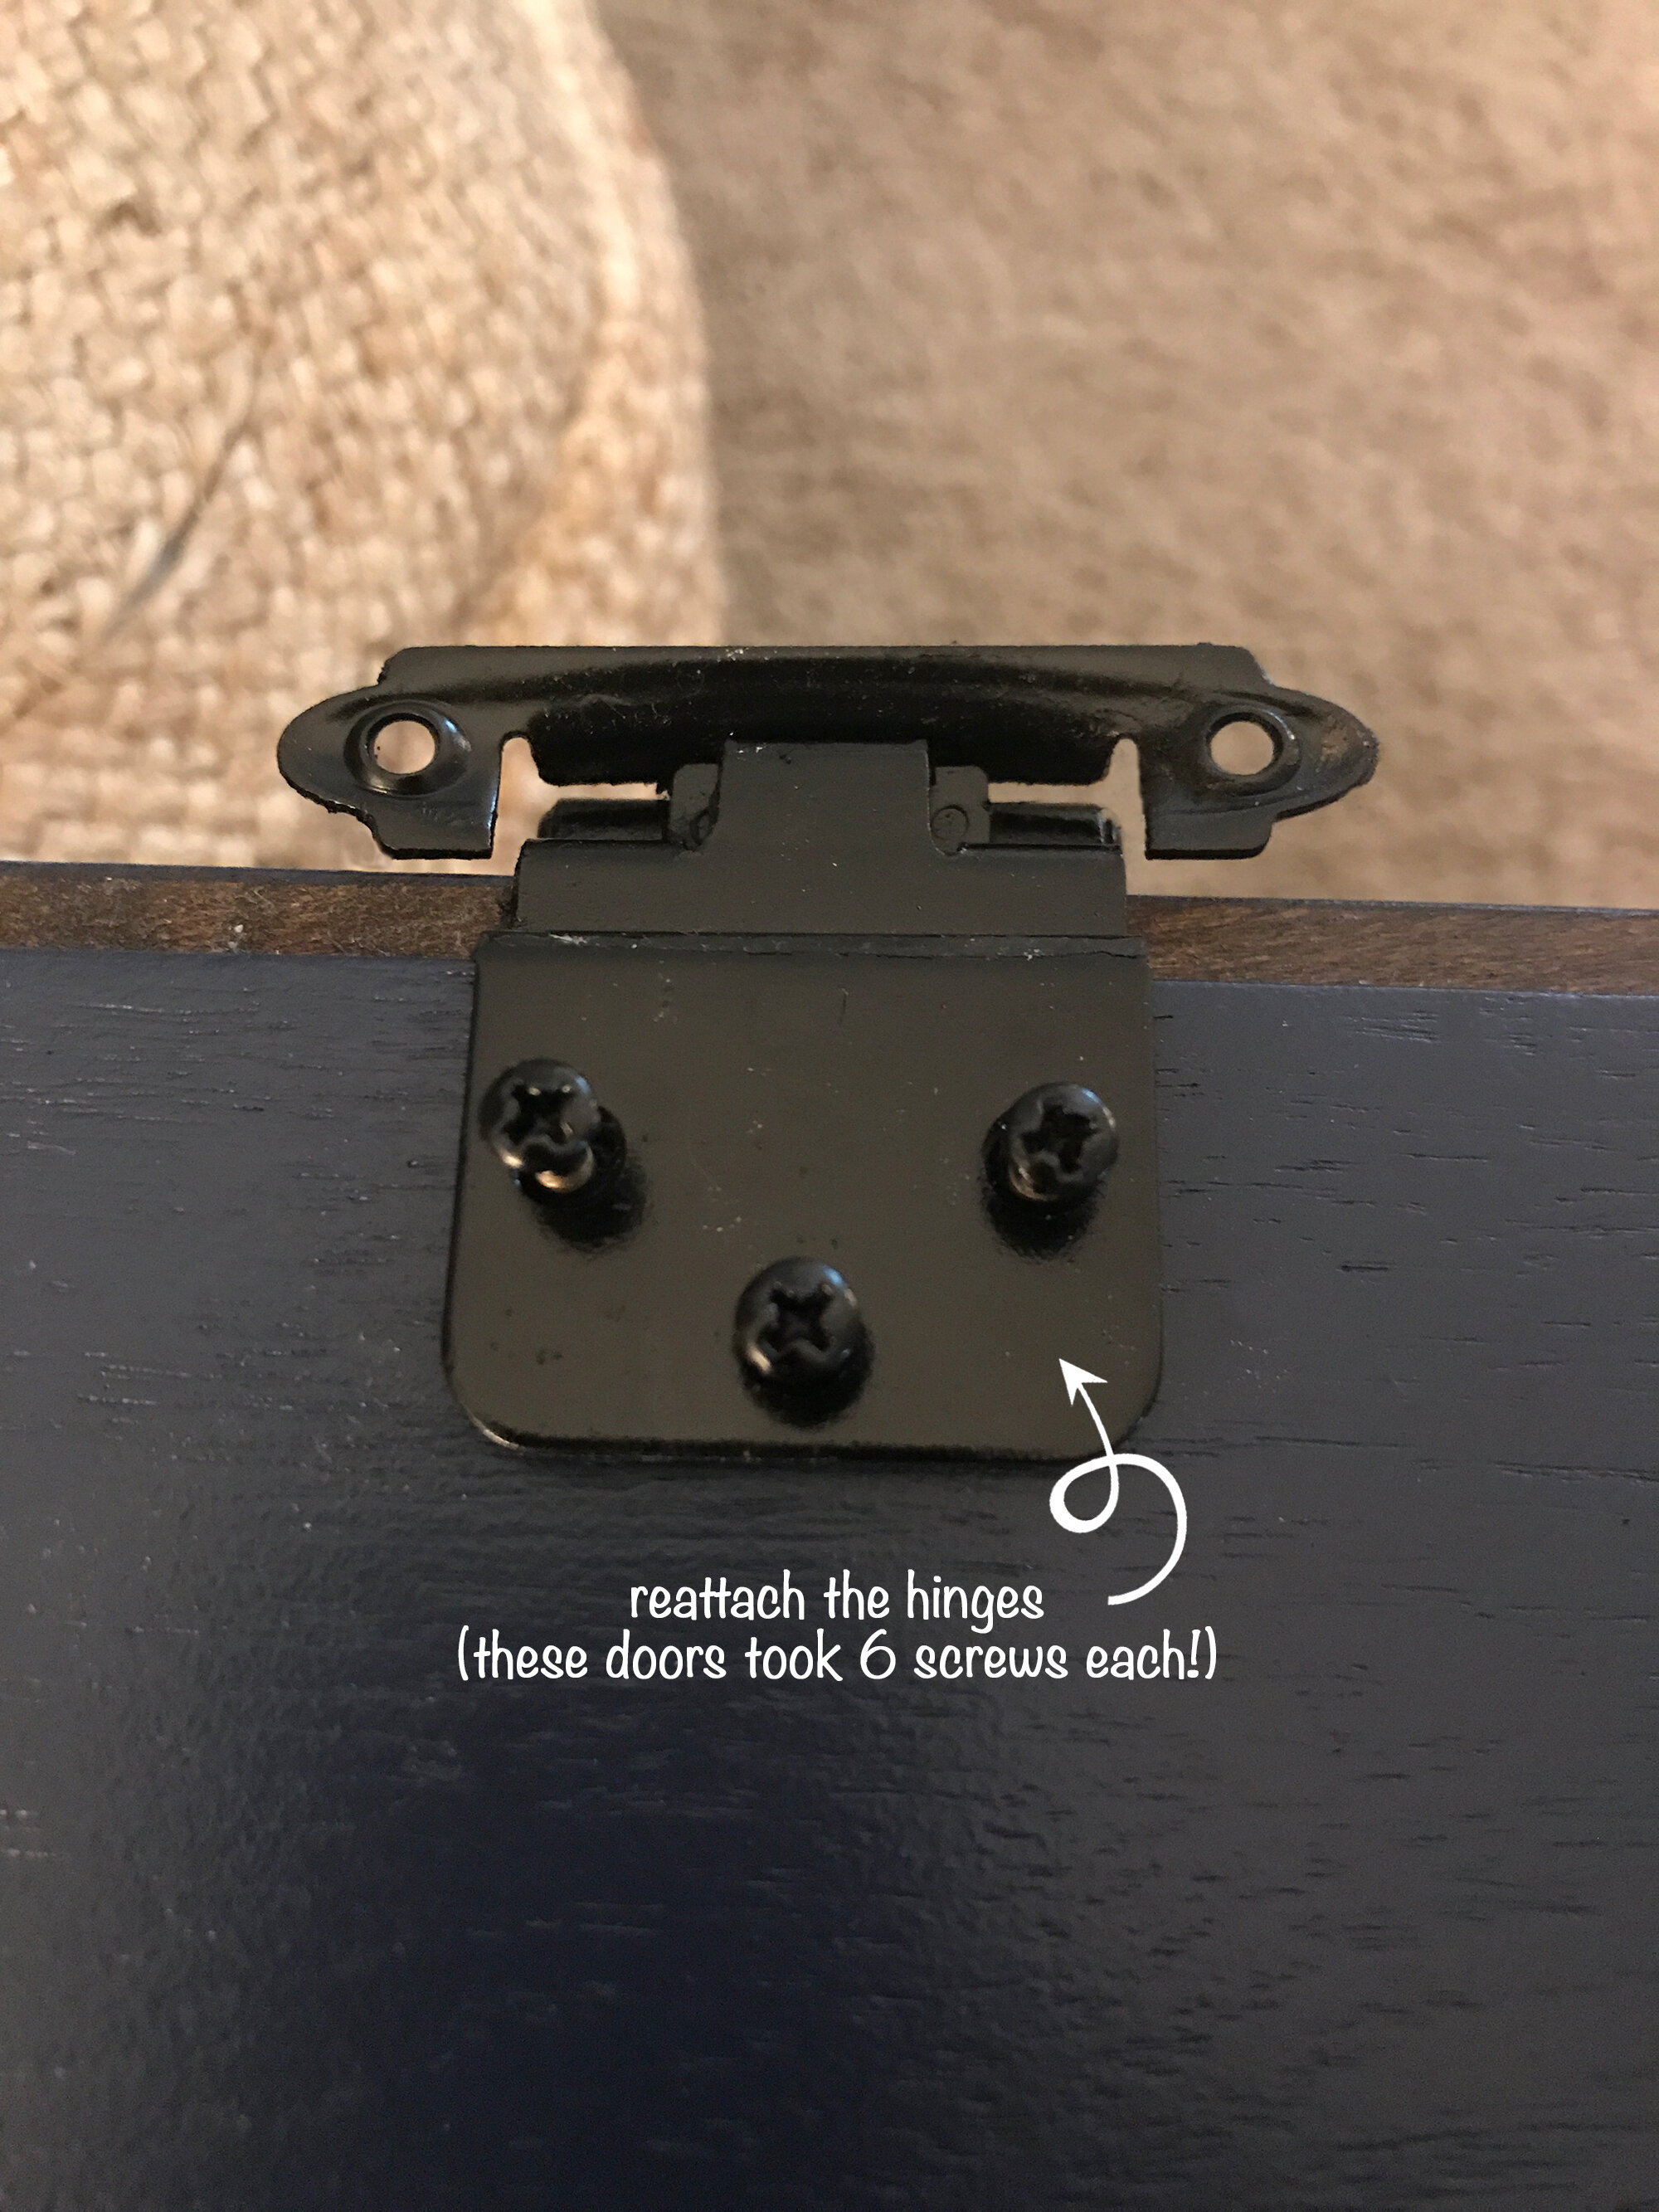
I started by removing all the doors and hardware from the vanity cabinet. I kept the drawers in place but you may choose to remove those as well, depending on your workspace. I decided to reuse the hinges so I set those up to be spray painted. I wanted the hinges to almost blend in with the cabinet, so I opted to paint them satin black. I placed the hinges on a cardboard box and poked the hinge screws into one of the flaps so everything would be coated evenly. After a couple coats of paint, they looked much better. I set the hinges and screws aside to dry completely while I started working on the cabinet, doors, and drawer fronts.
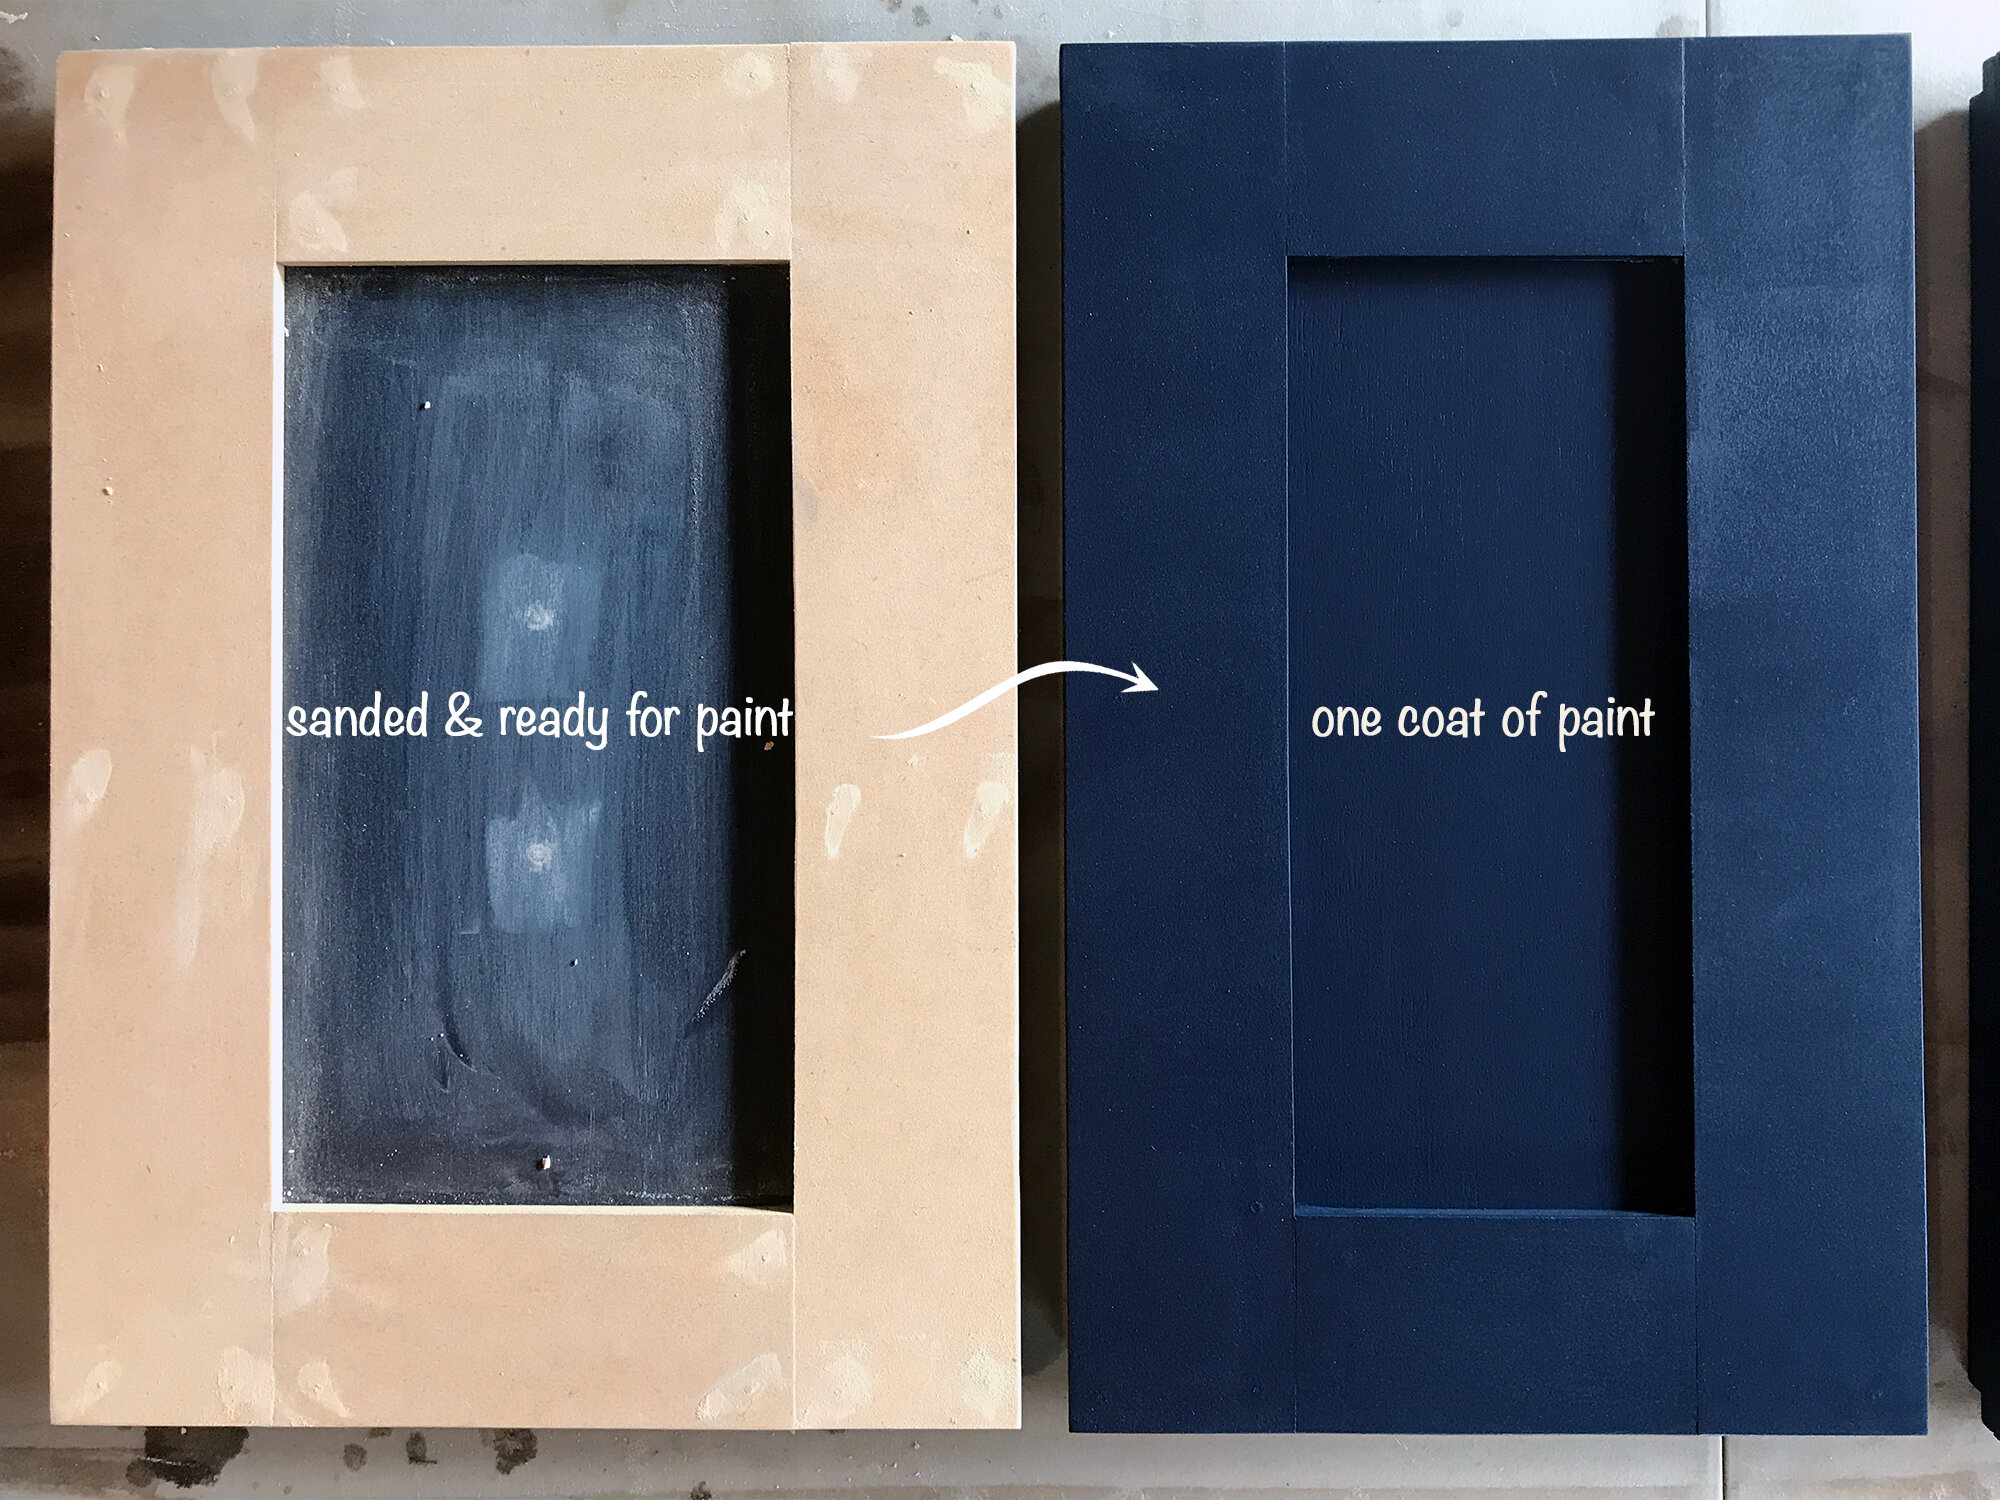
Once the hardware was removed from the doors and the cabinet, I lightly sanded the surface of the cabinet frame so that paint would adhere better. I wiped the whole surface down with a microfiber cloth to clean all the dust off and then used my foam roller and paintbrush to paint the cabinet, letting it dry completely between coats.
In order to completely cover the routed design in the doors and drawer fronts, I needed to rip my MDF sheets into strips: 2.75" wide for the doors and 1.75" wide for the drawers. I spent twice as much time getting the table saw unboxed, put together and set up than I did actually cutting the trim pieces. Let me tell you - I wish I'd purchased that saw a long time ago! I calculated how many strips I'd need of each width making sure I had extras of both just in case I needed them (and I did). If you're using lattice trim, you get to skip this part!

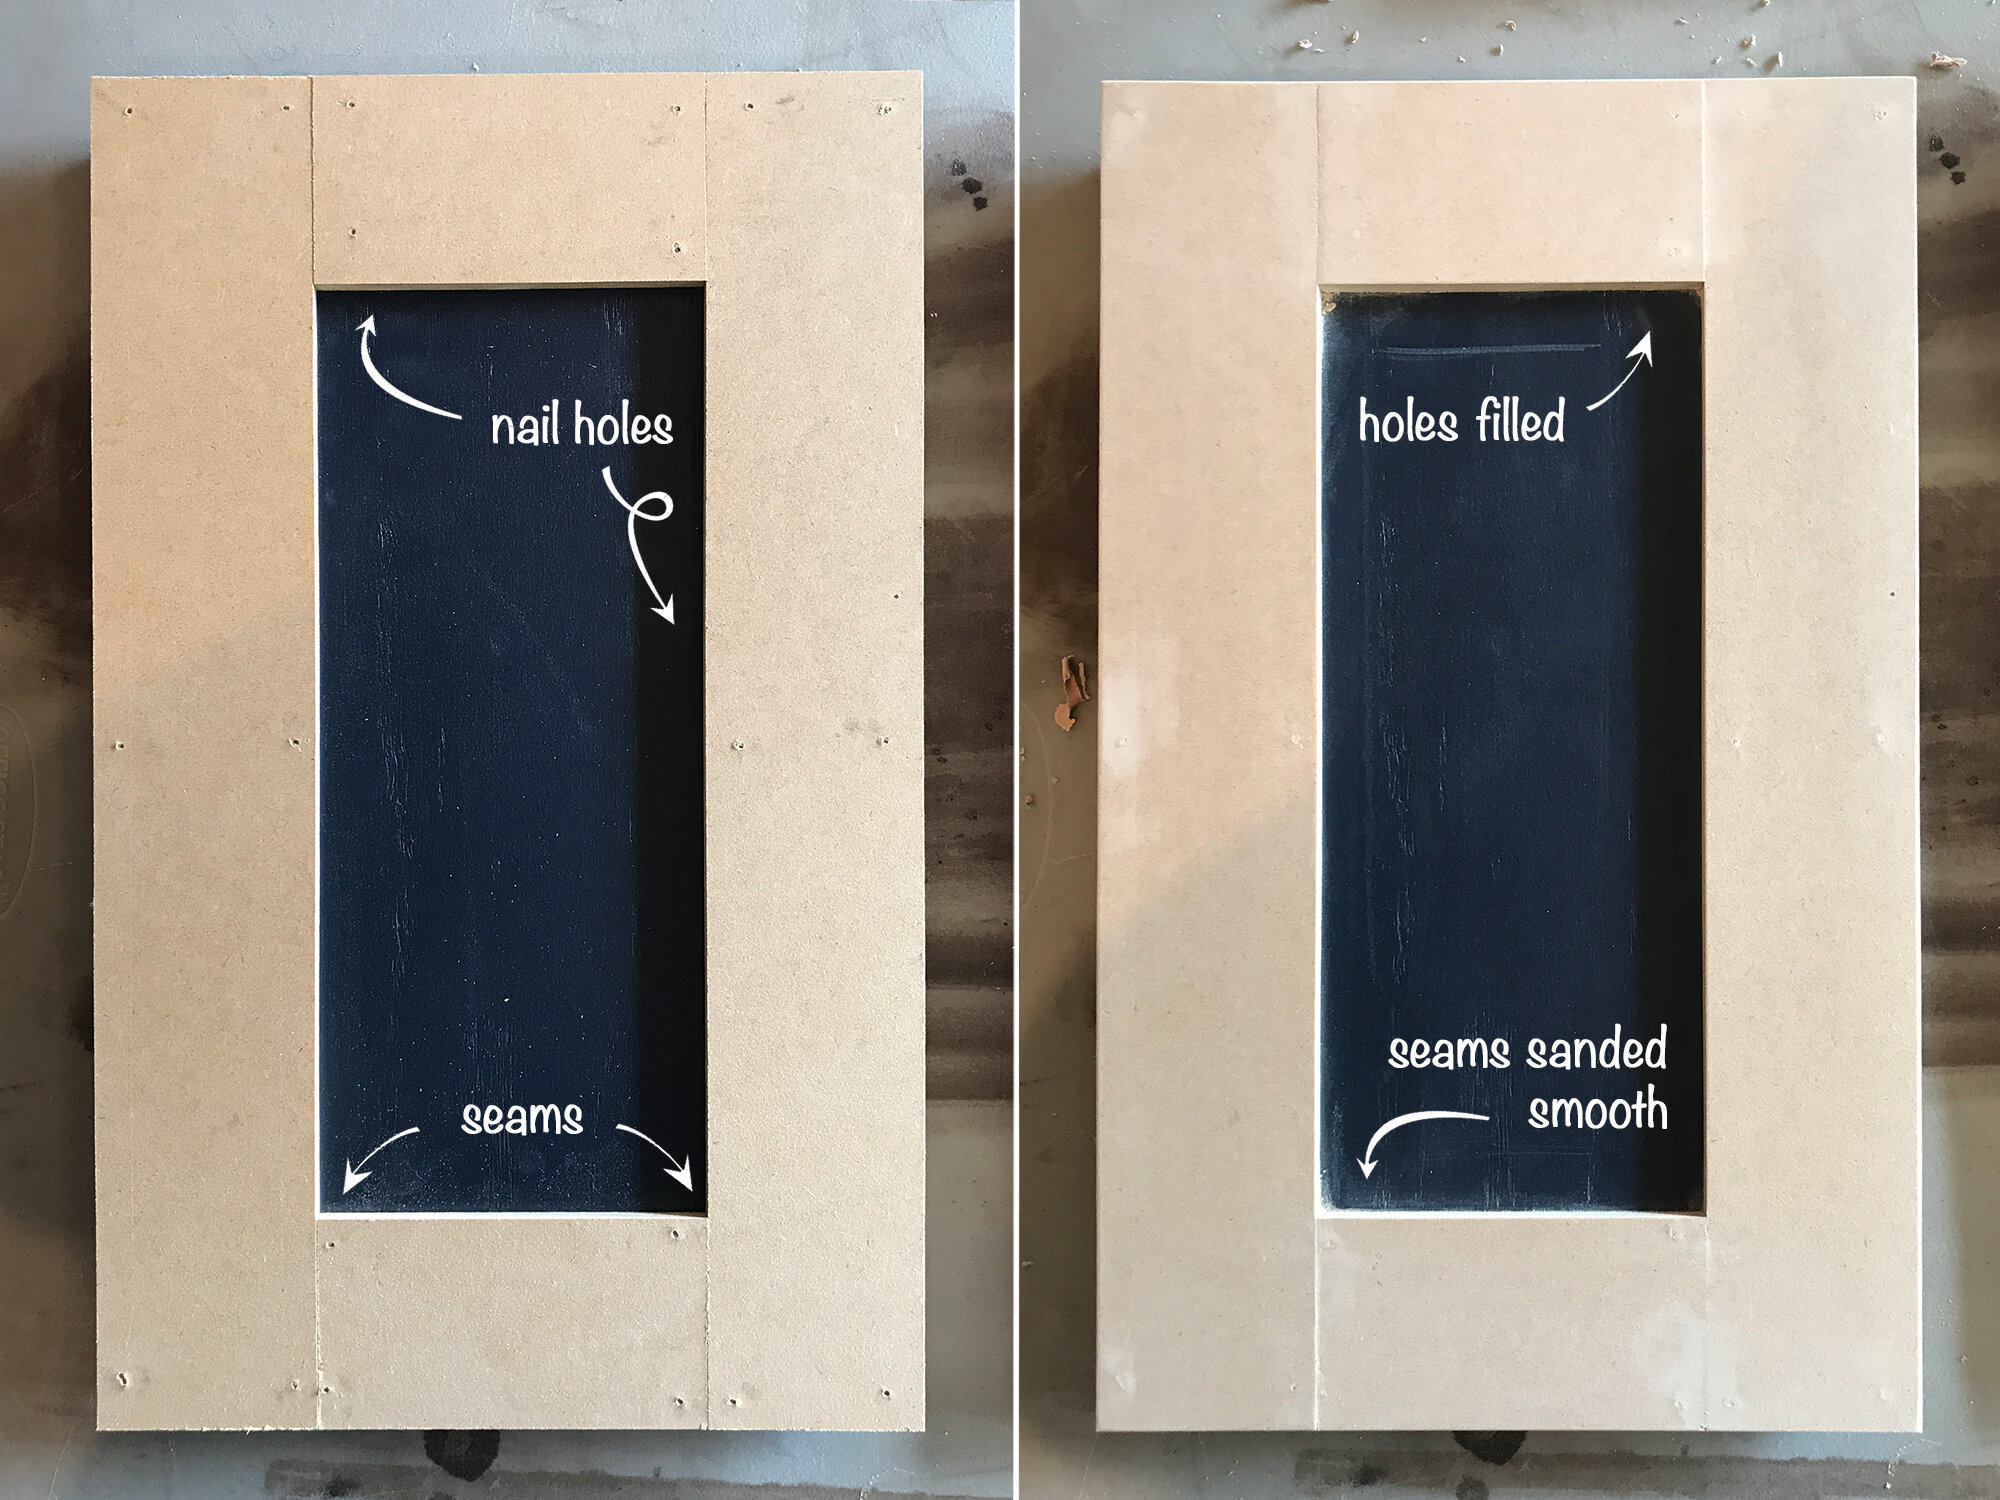
I wasn't about to put the handles back in the center of the doors again, so I got to work filling the holes on both sides of the doors with my putty knife. The wood filler I used was pink when it came out of the container and slowly faded to a natural wood color to indicate it was dry and ready for sanding.

Once dry, I scraped the excess off with my putty knife and then sanded both sides of the doors using the 100 grit sandpaper and finished up with the 320 grit sandpaper. A few doors required a couple applications of the putty and some good sanding before they were completely flat and unnoticeable. I wiped everything down with a microfiber cloth and dusted off my work table to prepare for the first coat of paint.
With one coat of paint on the doors and one coat of paint on the cabinet & drawer fronts, I was ready to start measuring and cutting the trim for the front of my cabinet doors. I measured the length of the first door, marked my trim and cut two pieces, one for each side. With the side trim pieces held in place, I measured the space between and cut two pieces to fit. It's important to make sure that your pieces are cut so they are even and flush with the edge of the doors.

Starting with the long pieces first, I held each piece flush against the edge of the door and used my nail gun to attach it at all four corners of the trim. Once the long pieces were attached, I nailed the short pieces in place being sure to keep everything straight, square and flush along the edges. This part goes really quickly (and it's really fun)!
I repeated this process for each door and drawer front: measure, cut, nail in place. If you used the manual nailer, you may need to use a nail set to pound the nails below the surface. Once all the doors and drawer fronts had been trimmed out, it was time to fill the nail holes using the same wood filler used earlier. After it had dried, I scraped the excess with my putty knife and sanded it all smooth.
After the wood filler was sanded smooth, it was time to start painting! This is where it actually started to look pretty and it was fun to watch the doors go from ugly, splotchy multi-colored messes to sleek, modern cabinet doors. It's amazing what paint can do!
I used the paint brush to get inside edges of the trim where it met the door and used my foam roller to cover the face of the trim, the door panel, and all the edges. The foam roller creates a smooth finish for the paint and helps to avoid any brush strokes in the finish. I did 3 light coats of paint, letting it (mostly) dry in between each coat. I was sure to clean the table well and let the fronts dry completely before turning them over to paint the back sides. I painted the drawer fronts in place just to avoid lugging them up and down the stairs to the garage where I was working.
I let the doors dry completely before bringing them into the house to reattach the freshly coated hinges. Thirty-six (!!) screws later, the doors were ready to install on the cabinet frame again. I had to slightly adjust the location of the hinges on the frame to account for the thickness of the paint so that the doors could open and close freely.
With everything painted and installed, the vanity looked brand new and 100% better! We just needed to add the final touch - hardware. I chose these simple, modern brushed brass drawer pulls and knobs from Lewis Dolin. They are elegant, good quality and an inexpensive way to add some glitz to the cabinet.
Let's take one more look at the before and after of this cabinet update that cost less than $150 in raw materials and required just one long weekend of my time. The financial investment will vary, of course, based on what tools you already own and what hardware you choose, but if you're looking for a way to update the look of your cabinets without spending a lot of money or time, give this a shot! If you do decide to tackle this project, send us photos or tag us on Instagram!